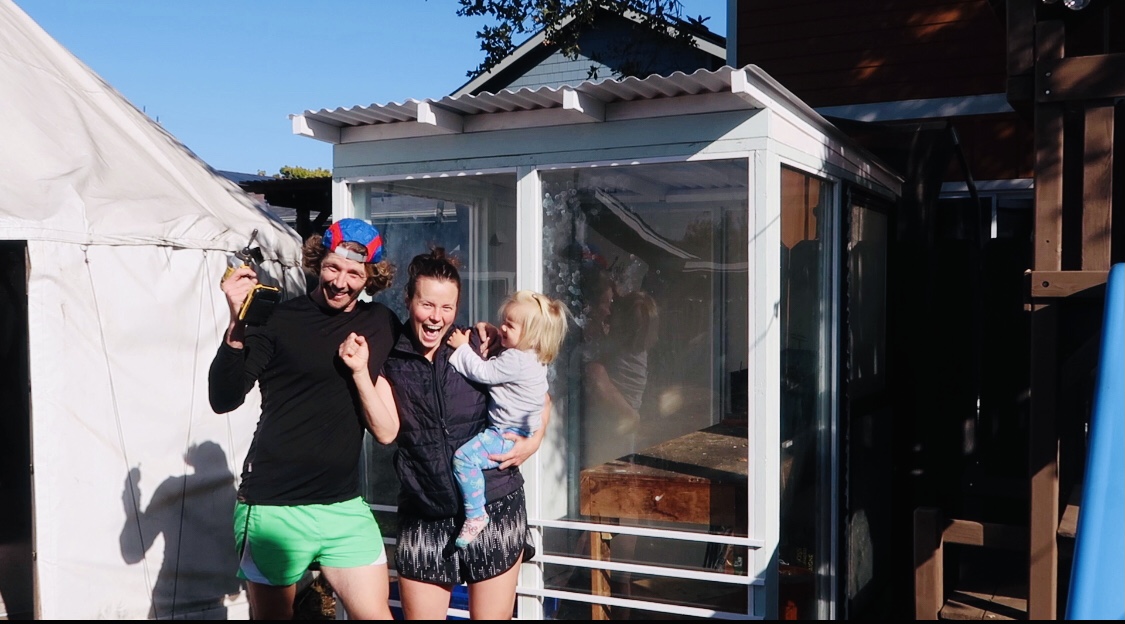
For less than $100!
I’m still wrapping my head around how we built our upcycled greenhouse for less than $100. In four days time, we took materials we had gathered, for free, and pieced together a way to build a greenhouse for all our little seedlings. What motivated bumping this project to the top of our massive projects list was the fact that I had over 300 seedlings living in our bedroom!

The Materials
- 18 2×4 studs
- 2 12ft treated 2×4 for base
- 2 inch deck screws
- Roof – 3 pieces 26×8 ft corrugated PVC
- 3 doors
- 5 long tempered windows
- Paint
The greenhouse’s walls are made up of five windows and three doors. Two of the doors are walls and one has hinges to be used as an actual door. Previously, the windows were all laying around looking for a new home. They all happily came together as walls of this upcycled greenhouse. We found the doors, windows, paint, and some of the lumber on Craigslist and Next Door and then built the frame around their dimensions. I feel like I could write a whole blog on the topic of using Craigslist and Next Door for finding free stuff – let me know if you are interested in the comments below.

Check out our Video of the Process:
The Frame
For the frame, we cut and screwed together 2×4 studs. We were lucky to find some leftover studs for free or next to free from project sites nearby. Prior to framing, we figured out the dimensions of all our free wood and windows to see what would work best for the shape of the greenhouse. For windows that were shorter than others, we simply added a 2×4 to the base to have it fit in frame with other window.
Next, to frame out the windows and doors, we sandwiched them between 3/4 inch square trim that ripped from 2×4 kiln dried studs. On a table saw, we managed to get 8 pieces from one 2×4. This was all thanks to the wonderful assistance from our local expert woodshop teacher, Pete.
The hardest part of setting up the frame was making the base of the greenhouse level with the hard packed dirt.

The Paint
We managed to also score on Next Door paint leftover from recent projects in the neighborhood. We actually love the bright colors and retro look it gives the project!

The Roof
For the roof, we decided to go with corrugated PVC, pitched at a slant for water to flow off roof. Due to the flimsy nature of this material, we needed to brace the interior with left over 2×4 wood.

The Final Details:
There you have it! This was a super fast and fun project to complete. We still need to find metal stacking shelves for the window (checking craigslist/ Next Door frequently for this!) as well as seal up any exposed areas to prevent bugs coming in.
The greenhouse windows are facing southwest for maximum sunlight in the most ideal place we could put it in yard. Within an hour of the windows and roof put together, it was already significantly warmer inside. We’ll be adding water jugs to help with retaining heat at night for winter. For summer time, one of the south facing windows opens to receive offshore breezes when we leave the door open during day. We’ll keep you posted how this evolves over time.
Big smiles over here at the Smith house. Thank you for joining in the adventure and let us know any questions/comments below!


